Easy at Home Tips to Get Your Baby Rolling:
Parents often ask me how they can help get their baby to roll. This article will walk you through easy at home tips to get your baby rolling. I will walk you through some tips and tricks that I have learned while working as a pediatric physical therapist over the past 4 years.
First, when does a baby learn to roll? This skill can be expected to begin around 4 to 5 months of age.
So, initially, your baby will start to hold their head up and be able to keep it in the middle, which happens around three months. Then they’ll start to track the toy with their eyes, then both their eyes and head as they get stronger. Soon after they start using their head to track the toy they will begin to initiate rolling movements as they lift one shoulder at a time off the floor trying both directions, then this is followed by beginning to lift one hip at a time off the ground. This will lead into the side lying position at first. It is great for them hang out and play in the side lying position and allow gravity to help them complete roll.
For these at home activities as long if your baby was born prematurely or has any known medical complications you should consult your pediatrician first.
Activity 1: Tummy Time
Tummy time is very important for all future milestones! It helps develop the underlying muscles such as neck control, head control, and shoulder stability/strength. All of that is necessary to learning how to roll, crawl, sit up, stand, walk and much more! You can start it right away with your new baby! You can use your chest for new borns (just have your baby lay on your chest is a form of tummy time) then slowly make their way to tummy time on the floor. There are techniques to help build them up to tummy time on the floor beause it can be a difficult activity for your child. You can refer to our tummy time blog or even keep an eye out for our tummy time class to learn some tricks!
Activity 2: Assisted Rolling
You can start this first activity early as two weeks old. This activity will help your baby to learn the motor pattern that is needed to achieve rolling. You would do this to both directions because you always want your baby to roll symmetrically in both directions. Your baby may start with just rolling back to belly at first but with helping them practice this motor pattern it will allow them to become stronger and roll belly to back.
To get them rolling from back to belly to the left you start by holding their left leg down gently. Then, gently guide the right hip over the left leg into a sidelying position. Sometimes I will keep them in this sidelying position for 30 seconds to a minute to see if they can complete the roll themselves by teasing them with a toy just out or reach first or some gentle rocking motions at the hip to help them complete the roll. You might have to move your hand on the left leg in order to get it out of their way.
When practicing rolling back to belly toward the right side same steps just opposite sides. You would start by holding their right leg down gently. Next, with your other had gently lift their left hip and guide it over the right leg leading into the sidelying position. Then again you may stop in the sidelying position for 30 seconds to 1 minute to do some light rocking at the hip to cause them to tip over or teasing them with a toy just out of reach. Then they will take part in the roll. As they become stronger, they will become more and more independant with rolling.
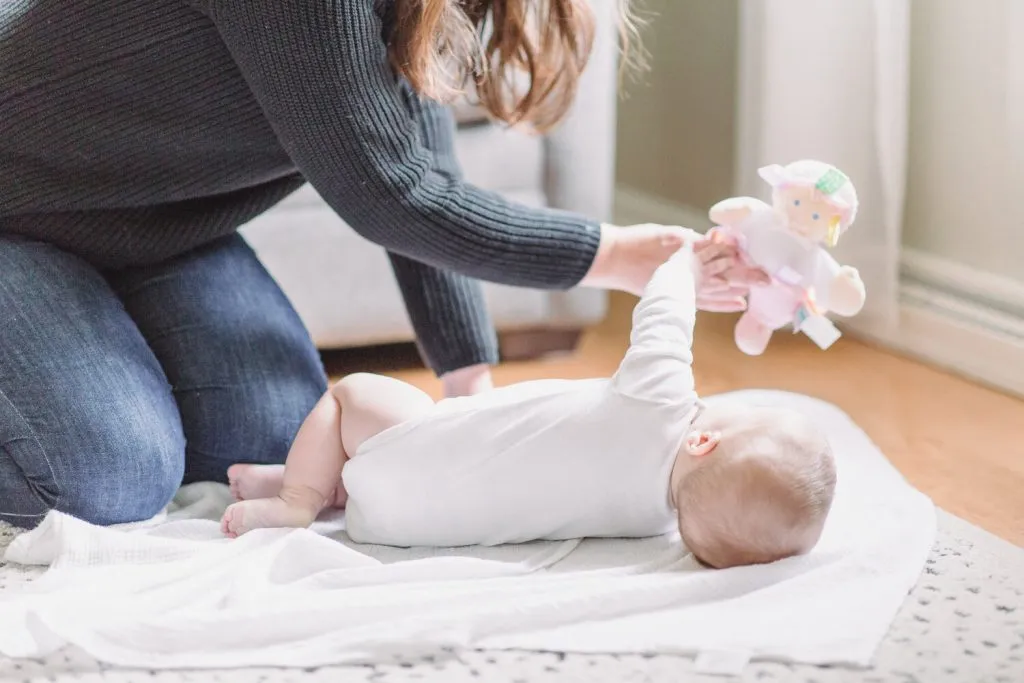
Activity 3: Toy Placement/Teasing
The positioning of the toys is a very important task when trying to teach your baby to roll. At the beginning of 4 months babies are holding toys right in front of them thats when you start to switch the positioning of toys. Similar to tracking a toy I would shake the toy or make a noise so the baby was looking at it and motivated to follow it. After they are interested in the toy I move it across their eyes to the side. As you place the toy on their side, raise it so that it is above their shoulders just out of arms reach. This encourages them to look up at it, lifting their shoulder off the ground. Then, they can rotate the trunk and begin practicing the rolling movement.
The Developmental Steps
Developmental Steps provides physical therapy for children from birth to age eighteen. To encourage active participation in the home, school, and community, we offer comprehensive assessments that are followed by personalized treatments.
Our goal is to make each child feel happy and able to function and interact with others at an appropriate age. Each child is encouraged and challenged by our supportive, playful, and fun environment.
Our clinicians share their therapeutic knowledge with families and caregivers. They provide step-by-step transfer exercises that enable our young patients to grow exponentially at home. We aim to establish strong, collaborative relationships with each child’s medical provider. We provide updates to all providers involved in each child’s care.
About the Author
Tara Murphy PTA, ATC, LAT has been a Physical Therapist since 2019 and an Athletic Trainer since 2014. Her passion for fitness stems from her time as a competitive soccer player and dancer. Tara, who has been with Developmental Steps, LLC, since 2019, has vast experience in multiple diagnoses, including hypotonia, torticollis, cerebral palsy, neurological injury, developmental delay, hypotonia, cerebral palsy, sports injuries and orthopedics. She is passionate about children and believes in making a difference in their lives through manual techniques and making exercises into creative games and lots of fun for the kids.